
Natural light is the most beautiful and the most unpredictable tool a photographer will ever work with. It changes minute by minute, bounces off walls you didn’t notice, and can make or break a wedding portrait, a product flatlay, or an interior shot. The good news? You don’t need expensive gear to master it. You just need to learn how to read light, position your subject, and shape what nature gives you.
In this guide, we skip the generic theory and walk you through 6 techniques based on real shooting scenarios: window light, overcast skies, backlight, golden hour, harsh midday sun, and interior spaces. Whether you shoot weddings, portraits, or products, these methods will help you get consistently better images.
Why Natural Light Is Worth Mastering First
Before you invest in strobes and modifiers, understanding sunlight will make every other lighting setup easier. Natural light teaches you to observe direction, quality, and color temperature in ways artificial light never will. Wedding photographers, in particular, rely on it 80% of the day because ceremonies, cocktail hours, and outdoor portraits rarely wait for you to set up flashes.
The core skill isn’t finding light. It’s learning to see it. Once you can spot where light is soft, where it’s harsh, and where it’s directional, you’re already ahead of most photographers. Natural Light Photography: How To Manipulate At Home tackles the same question from another angle.
Technique 1: Window Light for Portraits and Still Life
A large window is the closest thing you’ll get to a free professional softbox. It works for newborns, bridal prep shots, food photography, and product flatlays.
How to position your subject
- Side light (90 degrees): Places your subject parallel to the window. Creates dramatic shadows, great for moody portraits.
- 45 degree angle: The classic flattering angle for portraits. Adds dimension without heavy shadows.
- Facing the window: Flat, even light. Ideal for beauty shots and product photography.
- Back to the window: Creates a soft rim of light and a bright, airy background.
Softening harsh window light
If the sun is hitting the window directly, hang a white sheer curtain or a translucent shower curtain. Instant diffusion. For still life, place a piece of white foam board opposite the window to bounce light back and fill shadows.
Technique 2: Working With Overcast Skies
Cloudy days are secretly the best days to shoot. The entire sky becomes a giant diffuser, giving you soft, even light with no harsh shadows.
Tips for overcast shooting:
- Shoot in RAW and warm up your white balance slightly (5500K to 6000K) since cloudy light tends to be cool and blue.
- Watch for overhead shadows under the eyes. Even soft light comes from above. Have your subject tilt their chin up slightly or use a reflector at chest level.
- Look for pops of color in wardrobe or environment since the sky’s grayness can flatten everything.

Technique 3: Backlight for Dreamy Portraits
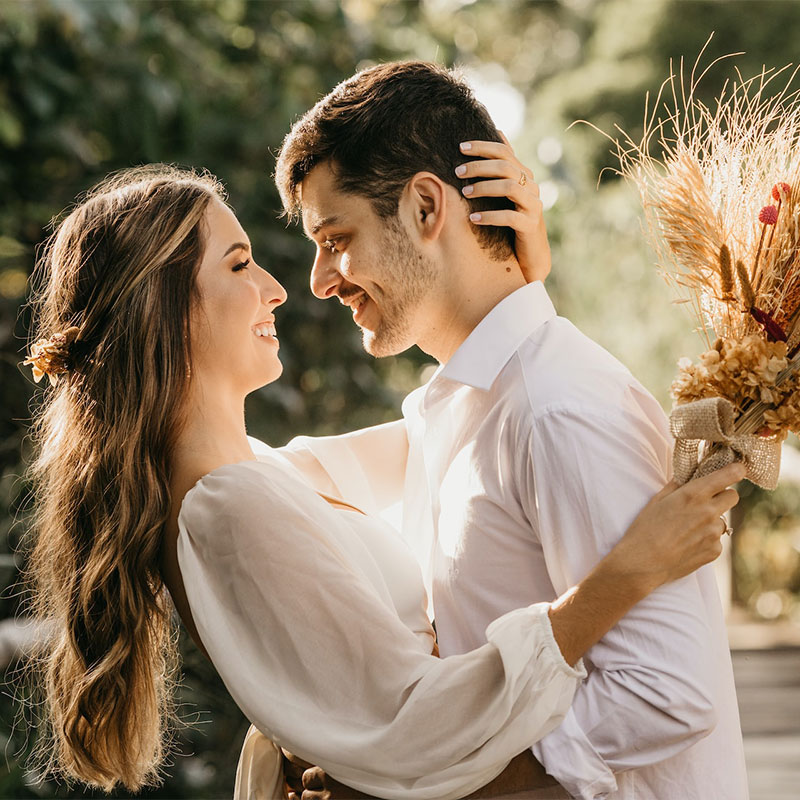
Backlighting places the sun behind your subject, creating a glow around the hair and separating them from the background. It’s the signature look of modern wedding and lifestyle photography.
Steps to nail backlight
- Position your subject with the sun behind them, ideally when the sun is low (early morning or late afternoon).
- Meter for the face, not the background. This will overexpose the background slightly, which is exactly what you want.
- Use a lens hood or your hand to block direct sun from hitting the front element, unless you want flare.
- Add a reflector or white surface in front of your subject to bounce light back onto their face.
Technique 4: Golden Hour and Blue Hour
These two windows of the day produce the most cinematic natural light you’ll ever shoot in.
| Light Type | When It Happens | Best For |
|---|---|---|
| Golden Hour | First hour after sunrise, last hour before sunset | Warm portraits, couples, landscapes |
| Blue Hour | 20-30 minutes after sunset or before sunrise | Cityscapes, moody portraits, architecture |
| Overcast Midday | 10am to 4pm on cloudy days | Group shots, editorial, product |
Use a sun tracker app (like Sun Surveyor or PhotoPills) to know exactly where and when golden hour hits your location. This is non-negotiable for planning outdoor shoots. It is done convincingly by a design studio worth a look.
Technique 5: Surviving Harsh Midday Sun
Sometimes you can’t reschedule. A wedding ceremony is at 1pm and the sun is directly overhead. Here’s how to handle it:
- Find open shade: The side of a building, under a large tree, or beneath an awning. Shade gives you soft, directional light without the raccoon-eye shadows.
- Use the sun as a hair light: Turn your subject so the sun hits the back of their head, then find a shaded area for their face.
- Look for reflected light: A bright wall, sand, or a light-colored patio bouncing sunlight back can act as a natural fill.
- Embrace contrast: Sometimes hard midday light works beautifully for editorial or fashion shots with strong geometry. Lean into it instead of fighting it.
Technique 6: Natural Light for Interiors
Shooting interiors, whether for real estate, Airbnb listings, or wedding venue portfolios, is all about maximizing available window light.
Practical checklist
- Turn off all indoor artificial lights. Mixing tungsten with daylight creates color casts that are painful to fix in post.
- Shoot during the brightest part of the day but avoid direct sun beams cutting across the floor.
- Use a tripod and bracket your exposures (3 to 5 shots at different exposures) to blend windows and interior detail later.
- Open every curtain and blind fully unless the view is unflattering.
- Stand in a corner and shoot toward the opposite corner to show depth.

Quick Test: Is Your Light Any Good?
Here’s a simple trick used by working photographers: flip your phone or camera into selfie mode and slowly rotate in a circle at your shooting location. Watch how the light falls on your face. When your skin looks smooth, your eyes catch a highlight, and shadows are gentle, stop. That’s where you place your subject.
Camera Settings Cheat Sheet for Natural Light
| Scenario | Aperture | Shutter | ISO |
|---|---|---|---|
| Golden hour portrait | f/2.0 to f/2.8 | 1/250 | 100 to 400 |
| Overcast outdoor | f/2.8 to f/4 | 1/320 | 400 to 800 |
| Indoor window light | f/2.0 | 1/160 | 400 to 1600 |
| Backlit portrait | f/1.8 to f/2.5 | 1/500 to 1/1000 | 100 to 200 |
Frequently Asked Questions
What is the best time of day to shoot with natural light?
The first and last hour of daylight (golden hour) give you the warmest, softest, and most directional light. For product and interior work, mid-morning on an overcast day is often ideal because the light stays consistent for hours. Natural Light Photography Guide tackles the same question from another angle.
How do I photograph in natural light without a reflector?
Use your environment. A white wall, a light-colored sidewalk, a piece of foam board, even a white bedsheet held by an assistant can act as a reflector. For indoor shots, position your subject near a wall that faces the window so light bounces back naturally.
Can I use natural light for professional work?
Absolutely. Many top wedding, editorial, and lifestyle photographers work exclusively with natural light. The key is knowing your locations, planning around the sun’s position, and having simple modifiers (a reflector, a diffuser) in your bag as backup.
How do I avoid squinting subjects in bright sun?
Have them close their eyes, then open them on the count of three right before you press the shutter. Better yet, turn them away from the sun and use it as backlight. You get flattering hair light and no squinting.
What’s the difference between hard light and soft light?
Hard light comes from a small or distant source (direct sun) and creates sharp, defined shadows. Soft light comes from a large source relative to the subject (an overcast sky, a big window with a sheer curtain) and creates gentle, gradual shadows. Soft light is generally more flattering for people, while hard light adds drama and texture.
Final Thoughts
Mastering natural light isn’t about memorizing rules. It’s about training your eye to see what most people walk past. Next time you’re outdoors or in a well-lit room, pause and notice where the light is coming from, what it’s bouncing off, and where the shadows fall. Do this every day for a month and your photography will transform, no new gear required.
Now grab your camera, find a window or step outside, and start shooting. The best light of the day is happening right now.